Table of Contents [Hide]
Inputlearn.net - How to create About, Contact, Privacy Policy, and Disclaimer page on a blog. Why should our blog be equipped with a static page? Because it is a requirement from Google for the clarity of our website. And as a mandatory requirement to register our site to Google Adsense later.

How to create a static page About, Contact, Privacy Policy, and Disclaimer
1. About (page)
- log in to your blogger dashboard.
- Click the Page menu on your blogger list.
- Click create a new page.
- Please fill in according to your data, or you can also add your hobby interests there. Also, add an active Email address if there are visitors who want to chat with you.
- Examples Like About on this blog. Click Here
- Publish Your Page.
Up here, to create an About Page on the blog. Very simple and easy.
2. Contact (page)
- log in to "Blogger" Go to the "Page" menu.
- Create a new static Page by clicking the "New Page" button
- In the content editor section, select HTML mode after inputting this code:
- Give it a title, then publish it.
<div class="con ac -form-widge "> <form name="con ac -form"> <span class="c i les">Nama :</span> <inpu class="con ac -form-name" id="Con ac Form1_con ac -form-name" name="name" ype=" ex " value="" /> <span class="c i les">Alama Email <span class="swajib">*</span> :</span> <inpu class="con ac -form-email" id="Con ac Form1_con ac -form-email" name="email" ype=" ex " value="" /> <span class="c i les">Isi Pesan <span class="swajib">*</span> :</span> < ex area class="con ac -form-email-message" id="Con ac Form1_con ac -form-email-message" name="email-message" rows="10"></ ex area> <inpu class="con ac -form-bu on con ac -form-bu on-submi " id="Con ac Form1_con ac -form-submi " ype="bu on" value="Kirim" /> <br /> <div class="con ac -form-error-message" id="Con ac Form1_con ac -form-error-message"> </div> <div class="con ac -form-success-message" id="Con ac Form1_con ac -form-success-message"> </div> </form> </div> <scrip src="h ps://www.blogger.com/s a ic/v1/widge s/2271878333-widge s.js" ype=" ex /javascrip "></scrip > 3. Privacy Policy (page)
- Please visit the site Privacypolicyonline.com
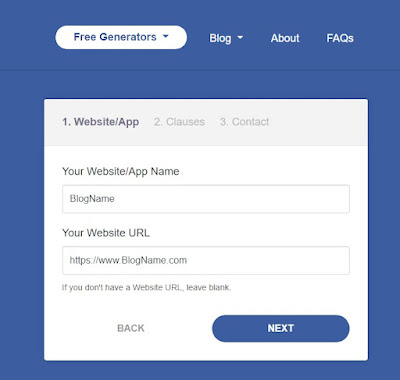
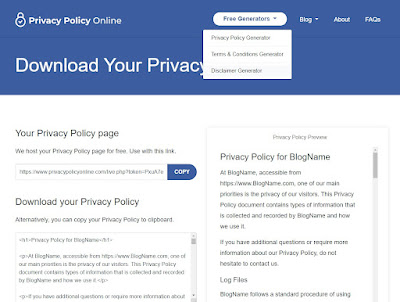
- Then click on the "Free Generators" menu. And select Privacy Policy. Look at the picture below.


- After filling out all the forms, then copy the code in HTML format.

- Then go to your blogger and create a new page.
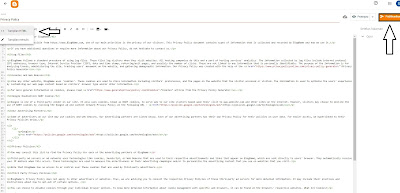
- Select HTML view instead of Writing View. Please paste the code.

- Finally, give the title "Privacy Policy," then Publish.
4. Disclaimer (page)
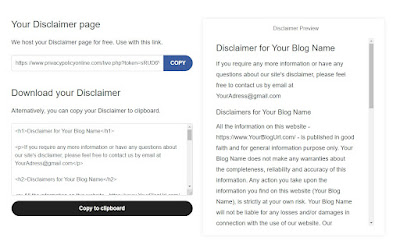
- The method is still the same as we made the Privacy Policy earlier. Please return to Privacypolicyonline.com earlier. Then click "Free Generators" Select Disclaimer Generator.
- Look at the picture below as an example of filling out a form.


- If all the forms above have been filled. Next, paste the code on the new page of your blog, like the example image below.

- Done; Page is ready to publish.
Conclusion
So that's how to create an About, Contact, Privacy Policy, and Disclaimer page on a blog. Hopefully, this article is helpful, and thank you for visiting.